If you own a Jeep vehicle made before 2006, it may come with the iconic Jeep 4.0 engine. On your Jeep 4.0L, there are a lot of moving parts which need to trigger specific times to function properly. Among them, the distributor is one.
If you replace the distributor or do any modification, you should set distributor timing properly. Otherwise, it’ll cause an issue with the air-fuel mixture and create hassle on your beautiful ride.
So, you should know the proper timing of the ignition and what to do when it is misaligned. So, in today’s guide, I’ll provide you with an in-depth guide regarding Jeep 4.0 distributor timing and how to keep it up to date.
How do I know if my Jeep 4.0 distributor timing is off?
If the distributor timing is off, you’ll notice several performance issues that indicate you should set the proper timing. Here are some common signs that distributor timing is off.
- Engine knocking: When the timing is off, it feels like running with a heavy load. It occurs when the air-fuel mixture is ignited in the cylinder too soon. For this, the combination pushes pistons that still try to compress the mixture.
You’ll also notice loud clicking or pinging noise from the engine while driving. But you’ll notice no unusual sound when the engine revs up on neutral, which is a strong sign that the distributor timing is off.
- Check engine light: If the engine fails to properly timing, then you’ll notice the check engine light will appear. But, it can occur for a variety of reasons. So, make sure that it is through timing code using an OBD2 scanner tool.
- Overheating: When the air-fuel mixture ignites earlier than the proper combustion time, it generates more heat than usual. The increasing heat can hamper other parts of your jeep.
- Occasional misfire: If the cylinder pistons fail to move orders correctly, you’ll notice occasional misfires. Also, the cylinders become out of sync due to mistiming, and the occasional misfire will occur.
- Rough idle: When the timing is off, cylinders cannot fire properly, and you’ll notice rough idling. It’ll be more noticeable when you’re on low rpm.
- Reduces fuel efficiency: If the distributor fails to mix air fuel properly, it’ll use more fuel than usual, affecting the car’s fuel economy.
How do you fix Jeep 4.0 distributor timing?
Before you start replacing the distributor, you should have a proper idea about distributor timing and how to set it. So, follow the below step-by-step guide regarding distributor timing setup. Also, the guide helps you to replace the distributor as well.
Distributor removing process
Step 1: Remove the Jeep from the gear and disconnect the battery’s negative terminal. Then, find out the top dead center for cylinder number 1. Then, follow the spark plug wire from there, and you’ll reach the distributor cap.
Step 2: Untie the screw from the distributor cap and take off the cable which is connected to the coil. You can lift the distributor cap and not pull out the wires connected to the cover to keep yourself hassle-free from messing up orders. After removing the cover, you can see the rotor.
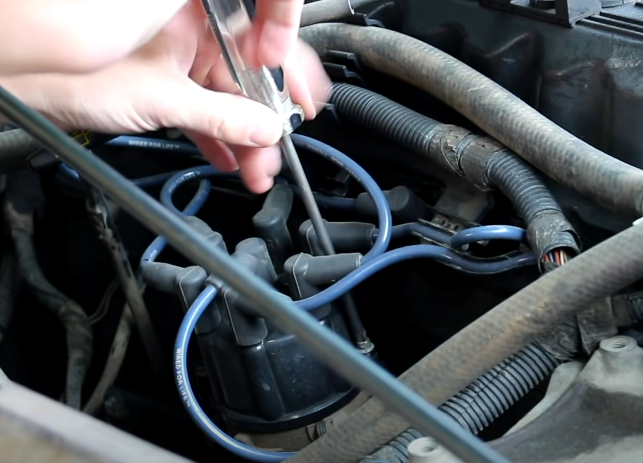
Step 3: After removing the cap, you’ll notice a mounting bolt beneath the distributor. Remove the bolt from the distributor. Now, pull the distributor out, and you’ll notice the rotor rotate counterclockwise a little bit when you’re doing the process.
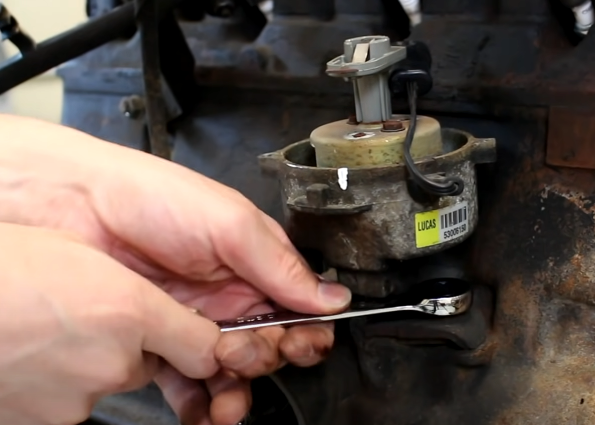
Quick tips: Before removing the rotor, you can mark the rotor’s position to ensure that you have a proper timing setup. Generally, the rotor aims towards 5 o’clock when it’s on compression stroke down at the TDC for cylinder one.
So, make a mark on the rotor below the housing, put the distributor cap, and also mark it for proper position. After replacing the distributor, if the rotor and cap match, you have done the proper distribution timing on your Jeep 4.0L engine.
Install a new distributor and setting distributor timing
Now, the most tricky parts. Don’t worry; follow the below step-by-step guide to setting distributor timing:
Step 1: For proper timing, the number one piston should have on top dead center. You need to rotate the crankshaft to do this. To do this easily, remove the hose to crank the crankshaft manually and use a flashlight to watch visually that the piston stops in the required place.
You should rotate the crankshaft vibration damper clockwise using a wrench until the number 1 cylinder comes towards TDC. When turning the crankshaft, you can put your thumb or a paper towel on the hole of the number 1 cylinder.
You will feel the air blow from it when it goes into the compression stroke. It means it hit TDC. You can use a camera to take pictures of where the piston stops on the cylinder wall.
Step 2: Look through the hole in which the distributor was removed. You’ll see a slot where the distributor meets with the oil pump. It turns the distributor and the pump. The position of the slot should be 11 O’clock. If it isn’t at 11 o’clock, use a screwdriver to put it in the right direction.
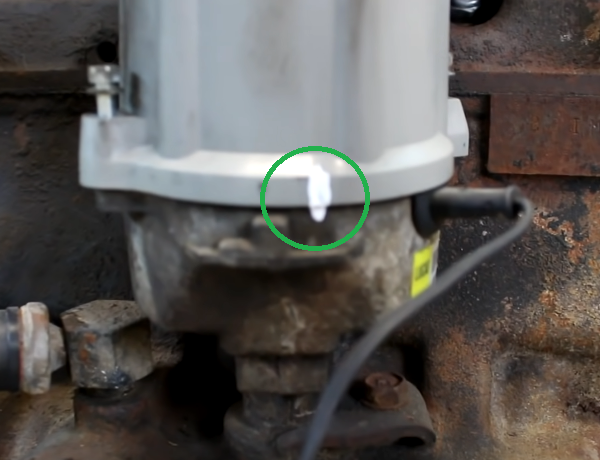
Step 3: Take the new distributor and remove the rotor and cam position sensor cover from the distributor. Then, you’ll notice four holes in a wheel. For proper setup, you need to align the hole with the distributor.
For this, use a screwdriver or punch tool to align the cam position wheel and distributor housing. It’ll make the timing perfect. You should insert the screwdriver or punch tool on the hole furthest to the left on the cam position wheel. It holds the distributor and the wheel in the proper position.
Step 4: Now, insert the whole distributor unit onto the frame where it belongs. You should position the bottom distribution plate at 1 o’clock when you put this in.
When you insert it at 1 o’clock, the bottom plate will rotate clockwise and stop just right when it reaches the mounting bolts. It means you insert the unit in the correct order.
Step 5: After proper positioning, remove the screwdriver from the distributor. After removing it, the whole unit will stay in place without any movement as the position is locked in the housing as it needs to be.
Then, put the camshaft sensor cover back on and attach the rotor. The rotor should be pointing at the 5 O’clock position.
Step 6: Put the distributor cap back on and make sure the wires are in the right spot and cylinder. Then, attach the mounting bolt and tighten it. Now, you’re perfectly set timing on your jeep 4.0.
How to use a Timing Light to set ignition timing?
You can use a timing light if you want to set the proper timing without removing the distributor’s whole panel. Below are showing a few steps which will help you to do the process using a Timing Light tool:
Step 1: The timing light comes with three leads. First, connect the two leads with the battery’s positive and negative terminals. Then, connect the leftover lead with the number 1 spark plug wire.
Step 2: Now, locate the marks on the timing indicators. You’ll find the mark on the crank pulley. If you’re using dial-back timing light, use an adjuster knob set to its zero position (it’ll slightly vary according to the making year of your jeep 4.0).
Step 3: Start the engine and allow it to rise to an operating temperature. Then, disconnect the vacuum line from the distributor and block the free end of the hose. Then, pointing the timing gun at the timing tab on the engine. If the timing light connects properly, you’ll see the light flashing from the timing light.
When the timing light is triggered by the spark from the #1 cylinder and flashes, it lights up the balancer’s mark. It indicates a relationship to the timing mark found on the timing tab.
Step 4: Now, lose the distributor clamp with a wrench to adjust it by turning your hand. Now, rotate the distributor in the same direction as the normal rotation of the rotor.
After adjusting, check the timing with the timing light. If you get the proper setup, tighten the bolt you lose. Otherwise, follow the steps again to get proper timing. After successful setting up the timing, remove the timing light and reattach the vacuum line.
Final words
You need to mess up with distributor timing for various reasons. Due to its position, you also need to remove it when other parts, like the crankshaft, need to be replaced in your jeep. So, you should have a clear idea regarding the distributor timing when doing any task with it.
Otherwise, you’ll fall into several issues and cause your headache. So, today’s guide will help you know more about Jeep 4.0 distributor timing. Also, you can learn how you can remove and replace it, along with maintaining proper ignition timing.
Related Posts: